Tuesday, 4 December 2012

Basic Recording Orchestra 1

http://www.akg.com/site/product_tipps/powerslave,id,25,nodeid,2,_language,EN.html

Orchestral recording basics


Usually it takes a two-year university course plus years of experience before a sound engineer is capable of making really excellent orchestral recordings. The following basic facts and techniques may help you achieve good results in much less time.
It is generally better to use a stereo main microphone rather than trying to use a multimicrophone setup, because you need to mix everything down while recording and you can only use headphones for monitoring. It takes a lot of experience to get a good mix using headphones.
If you are recording to two-track, using a good sounding main microphone pair or a main stereo microphone should be your first choice.
Try to get the soloists to play in front of the orchestra so their sounds will not be drowned out by the orchestra and you will get a well-balanced recording. This also improves the communication between the conductor and the soloists.
Recording locations may be anything from dry to extremely reverberant, so we would like to suggest three different microphone setups. Also, remember that you should select your microphones to match the acoustics of the recording room.
ORTF technique (for more reverberant rooms)
Mount two cardioid mics (AKG C 480 B + CK 61 or C 391 B) on a short stereo bar, angling each 55° off axis (110° between the two mics), making sure the distance between the capsules (the centers of the two diaphragms) is 17 cm (6.7 in.).
Place the microphone pair about 2 to 2.5 meters (6 1/2 to 8 feet) higher than the floor of the performance area (where the orchestra sits), about 1.25 to 2.00 meters (4 to 6 1/2 feet) behind the conductor. If the floor of the audience area is higher or lower than the performance area you'd have to deduct or add the difference in height. Slightly point the whole array about 5° down.
Listen carefully to the results and adjust working distance and height until you are satisfied.
This miking technique will reduce the amount of ambience in your recording and provides good imaging.
The Decca Tree (for good sounding rooms with short reverberation times)
Use 3 omnidirectional Mics (C 480B + CK 62). You will have to mix the three mics down to two tracks, which is not very difficult. Set the L and R microphones to unity gain and the center mic to -5 dB to -10 dB. Listen carefully, you should not be able to hear the center mic, but you shouldn't get the impression of a "hole in the center" either.
Place the center microphone right behind the conductor, and make sure all microphones are about 1.8 to 2 meters (6 to 6 1/2 feet) above the performance area floor.
As omnis are not omnidirectional at all frequencies but tend to approximate a cardioid at higher frequencies, point them at the orchestra/choir (not as shown in the picture!).
This array will pick up much more reverberation and provide a recording with beautiful ambience. If you don't have enough space for one of the two setups described above, try the
XY technique
Mount two cardioid microphones (similarly to the ORTF technique) on a stereo bar, angle them 90° angle as shown above, with the capsules of the two mics above (just short of touching) each other.
Place the setup right behind the conductor 2 meters (6 to 6 1/2 feet) above the performance area floor, pointing 5° down. This will give you less ambience in the recording and you may have to add some artificial reverberation later on.
As mentioned before, this can only give you a basic idea of correct recording, as there is no out-of-the-box solution that suits every situation.
Our final suggestion is probably the most important: Take your time, listen, listen again, and do not be ashamed to move your mics during rehearsals. Experiment until you get the best sound!
As for peaks: During rehearsals, set your recording levels at - 6 dBfS (6 dB below maximum) for the loudest passages. This will leave you enough headroom for the performance recording. (Experience shows that musicians and singers are louder during the actual performance than they were during the rehearsals.)
By Georg Burdicek


ORTF technique

Decca Tree

XY technique


Recording Orchestra for film

http://scoringfilm.net/2011/01/16/orchestral-microphone-placement/

Microphone placement


As discussed in the ‘Orchestral recording debate’ post; multi mic techniques are indeed most common today. The challenge is where to place the main mics (hauptmicrophone) to keep a wide stereo image without being too close for concert naturalness in tonal quality, but at the same time not capturing too much ‘over-enveloping’ reverb tail.
Stereo-Image
Orchestral Stereo Image
The tried and tested solution is to place the main mics at around the conductor’s position and raise the height. This is adjusted to between a height of 3-7 meters to change the perspective between the rear and front of the orchestra. This method provides distance to avoid harsh timbre yet avoids the reverb tail wash.
These main mics are used to capture the majority of the sound, with the addition of spot mics, placed closer to individual instruments/sections that allow the engineer to enhance these groups as desired. The spot mics are panned to the positions heard in the main mics to replace some of the high and low-frequency spectrum (or articulation) lost, through distance, in the main mics. Further to this, ambient mics are placed in the audience position to capture the reverb tail. In fact many engineers actually choose to enhance or completely replace the reverb tail using high-end processors from Bricasti, Lexicon or Sony.
mic-diagram
Orchestral Mic Placement Diagram

Recording Orchestra 1

http://www.royerlabs.com/rectips_orchestra.html

Engineers use a wide variety of techniques when recording orchestras or small ensembles, from simply placing one stereo microphone just above and behind the conductor's head to using several spot mics for each instrument section in conjunction with one to several ambient microphones.

In this section we'll look at sessions where Royers were used to capture full orchestras as well as smaller ensembles.

Orchestra miking
Here's an example of a simple miking technique for full orchestra using one stereo Royer SF-24. The placement is 4-5 feet behind, and several feet above, the conductor.

This outstanding audio clip was provided by Russell Dawkins, who used one SF-12 to record the Ukrainian Radio Television Orchestra (sorry, we have no pictures of the recording). The recording chain was: one SF-12, 35 feet Monster cable, Studio Technologies mic pre, 6 feet Monster cable, Apogee A/D converter, coaxial cable, digital in on a portable DAT machine. Recorded at the studios of the Ukrainian Radio/Television Orchestra, Kiev.
Orchestra miking
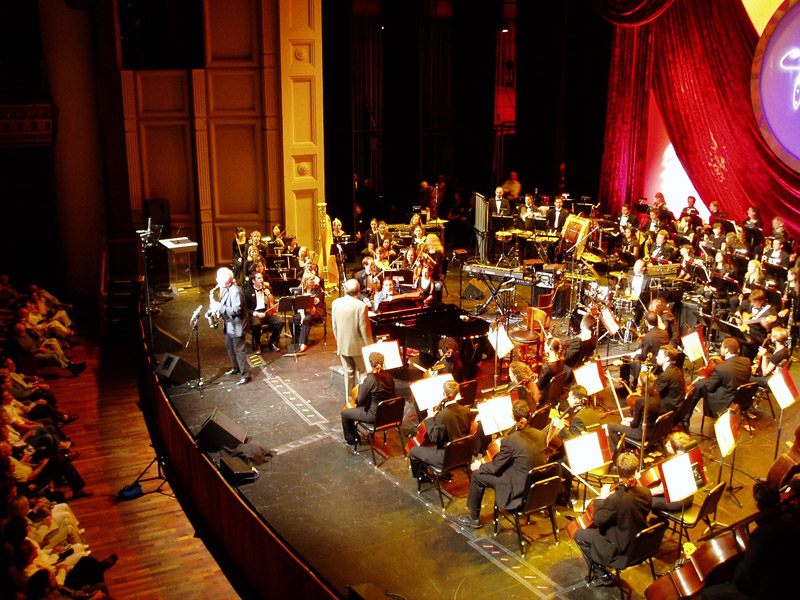
Here's another shot from the Henry Mancini Orchestra session showing an R-122 as a spot mic on the sax soloist.

Orchestra miking Orchestra miking
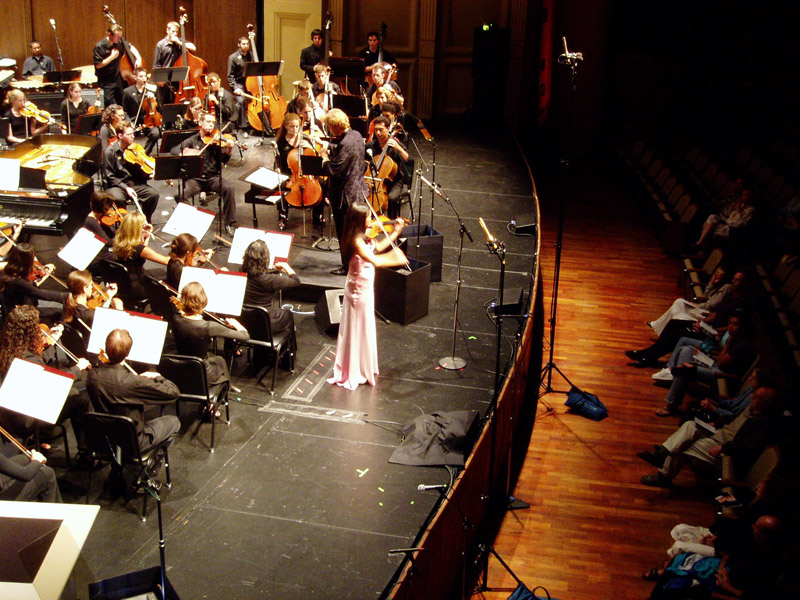
In this photo from the same concert, an R-122 was used to capture the solo violinist. The gold SF-24 stereo ribbon microphone to the right of the violinist was used for choir pickup in a later song.

Orchestra miking
For this small orchestra, all sections were spot miked and a Royer SF-24 stereo ribbon mic was placed over the conductor's head, an excellent location for getting a realistic audio picture of the orchestra and bringing cohesiveness to the final mix.

Orchestra miking
Close up on the conductor and SF-24.

Orchestra miking
Two Royer R-122s spot miking the French Horn section.

Orchestra miking
Scoring session at Sony with an R-122 spot mic on the timpani.

Orchestra miking Orchestra mikingOrchestra miking
Decca Trees are often used when recording orchestras. Developed in the early 1950s by a team of engineers at Decca Records, this method involves using a spaced stereo pair of mics with an added center fill, usually placed over the conductor. Scoring engineer Alan Meyerson often uses three R-122V's on the Decca tree, with a backline of condenser mics behind the conductor. This picture was taken during the scoring session for Pirates of the Caribbean, Dead Man's Chest.

Orchestra miking
Two R-122V's as overhead mics on the woodwind section. In this position, the R-122V's figure-8 pattern picks up the woodwind instruments and also rejects the brass section which is positioned behind the woodwinds.

Orchestra miking
Another view of the R-122V's as overheads on the woodwind section.

Orchestra miking
An additional R-122V is placed behind the bassoon.

Orchestra miking
A single R-121 was used to capture the three seat trumpet section.

Miking Techniques 2

http://www.deltamedia.com/resource/stereo_microphone_techniques.html

STEREO MICROPHONE TECHNIQUES


by Bruce Bartlett © 2006


Stereo miking is the preferred way to record classical-music ensembles and soloists, such as a symphony performed in a concert hall or a string quartet piece played in a recital hall. Stereo mic techniques capture the sound of a musical group as a whole, using only two or three microphones. When you play back a stereo recording, you hear phantom images of the instruments in various spots between the speakers. These image locations -- left to right, front to back -- correspond to the instrument locations during the recording session.In this article we'll look at several techniques for recording in stereo.

Advantages of Stereo Miking
When recording popular music, we put a mic near each instrument, record it, and pan its image somewhere between our two monitor speakers. Then we hear where each instrument is -- left, center, half-right, or whatever. But panned mono tracks are not the same as true stereo. A twomic
stereo recording captures the holistic sound of the ensemble playing together in a shared
space. Large single instruments -- such as piano, drums, and pipe organ -- also benefit from
being recorded in stereo.
Stereo miking adds lifelike realism to a recording because it captures:

  • The left-to-right position of each instrument.
  • The depth or distance of each instrument.
  • The distance of the ensemble from the listener (the perspective).
  • The spatial sense of the acoustic environment, the ambience or hall reverberation.
  • The timbres of the instruments as heard in the audience.

These characteristics are lost with multiple close-up microphones. Another advantage of stereo miking is that it tends to preserve the ensemble balance as intended by the composer. The composer has assigned dynamics (loudness notations) to the instruments in order to produce a pleasing ensemble balance in the audience area. Thus, the correct balance or mix of the ensemble occurs at a distance, where all the instruments blend together
acoustically. But this balance can be upset with multiple miking. You must rely on your own judgment (and the conductor's) regarding mixer settings to produce the composer's intended balance. Of course, even a stereo pair of mics can yield a faulty balance. But a stereo pair, being at a distance, is more likely to reproduce the balance as the audience hears it.

Some outstanding examples of non-orchestral two-mic stereo recordings are those by Bob Katz (www.chesky.com), Pierre Sprey (www.mapleshaderecords.com), and Kavi Alexander (www.waterlilyacoustics.com).

Goals of Stereo Miking
One goal we aim for when miking an ensemble in stereo is accurate localization. That is, instruments in the center of the group are reproduced midway between the two speakers. Instruments at the sides of the group are heard from the left or right speaker. Instruments halfway to one side are heard halfway to one side, and so on.

Figure 1 shows three stereo localization effects. Figure 1A shows some instrument positions in an orchestra: left, left-center, center, right-center, right. In Figure 1B, the reproduced images of these instruments are accurately localized between the speakers. The stereo spread, or stage width, extends from speaker to speaker. (You might want to record a string quartet with a narrower spread).


Figure 1.

Stereo localization effects:

(A) Orchestra instrument locations (top view).
(B) Images localized accurately between speakers (the listener’s perception).
(C) Narrow-stage effect.
(D) Exaggerated separation effect.

A stereo pair of microphones can be angled apart, spaced apart, or both. Angling and spacing affect the stereo localization, as does the polar pattern of the microphones.

If you space or angle the mics too close together, you get a narrow stage width (Figure 1C).
If you space or angle the mics too far apart, you hear exaggerated separation (Figure 1D).

That is, instruments halfway to one side are heard near the left or right speaker. To judge stereo effects, you have to sit exactly between your monitor speakers (the same distance from each). Sit as far from the speakers as the spacing between them. Then the speakers appear to be 60 degrees apart. That is about the same angle an orchestra fills when viewed from a typical ideal seat in the audience (say, tenth row center). If you sit off-center, the images shift toward the side on which you're sitting and are less sharp.

Types of Stereo Mic Techniques
To make a stereo recording, you can use one of these basic techniques:

  1. Coincident pair
  2. Spaced pair
  3. Near-coincident pair
  4. Baffled pair

Let's look at each technique.

Coincident Pair
With this method (also called XY), you mount two directional mics with grilles touching, diaphragms one above the other, and angled apart (Figure 2). For example, mount two cardioid mics with one grille above the other, and angle them 120 degrees apart. You can use other patterns too: supercardioid, hypercardioid, or bidirectional. The wider the angle between mics, the wider the stereo spread.


Figure 2. Coincident-pair technique.

How does this technique make images we can localize?

Recall that a directional mic is most sensitive to sounds in front of the mic (on-axis) and progressively less sensitive to sounds arriving off-axis. That is, a directional mic puts out a high-level signal from the sound source it's aimed at, and produces lower-level signals from sources to the side of the mic.

The coincident pair uses two directional mics that are angled symmetrically from the center line (Figure 2). Instruments in the center of the group produce the same signal from each mic. When you monitor the mics, the same signal comes out of each speaker. Identical signals from two speakers produce a phantom image midway between the speakers. So you hear the center instruments in the center.

If an instrument is off-center to the right, it is more on-axis to the right-aiming mic than to the leftaiming mic. So the right mic will produce a higher-level signal than the left mic. When you monitor the mics, the right speaker’s signal is louder than the left speaker’s signal. This reproduces the image off-center to the right. So you hear the right-side instruments toward the right side. That is how coincident stereo miking works.

The coincident pair codes instrument positions into level differences between channels. The brain decodes these level differences back into corresponding image locations. A pan pot in a mixing console works on the same principle. If one channel is 15 to 20 dB louder than the other, the image shifts all the way to the louder speaker. Suppose we want the right side of the orchestra to be reproduced at the right speaker. That means the far-right musicians must produce a signal level 20 dB higher from the right mic than from the left mic. This happens when the mics are angled apart by a certain amount. Instruments partway off center produce interchannel level differences less than 20 dB, so you hear them partway off center.

Listening tests have shown that coincident cardioid mics tend to reproduce the musical group with
a narrow stereo spread. That is, the group does not spread all the way between speakers.

A coincident-pair method with excellent localization is the Blumlein array. It uses two bidirectional
mics angled 90° apart and facing the left and right sides of the group. A recording made with coincident mics is mono-compatible. If you expect that your recordings will be heard in mono (say, on TV), then you'll probably want to use coincident methods.

A special form of the coincident-pair technique is the mid-side (MS) recording method illustrated in Figure 3. It uses a “mid” microphone facing the middle of the orchestra and a bidirectional microphone aiming to the sides. The middle mic is most commonly cardioid, but it can be any pattern.


Figure 3. Mid-Side (MS) technique.

In a device called a matrix, the signals from both mics are summed (mixed together) to produce the left-channel signal and are differenced (mixed in opposite polarity) to produce the rightchannel signal.

You can remote-control the stereo spread by changing the mid/side ratio in the matrix. This remote control is useful at live concerts, where you can't physically adjust the mics during the concert. You can also control the stereo spread during mixdown rather than during the recording.

If you record with a mid-side microphone, you can change the monitored stereo spread either
during the recording or after.

To change the spread during the recording, connect the stereo-mic outputs to the matrix box and connect the matrix-box L–R output to the recorder. Use the stereo-spread control (M/S ratio) in the matrix box to adjust the stereo spread.

To alter the spread after the recording using a matrix box: Record the mid signal on one track and the side signal on another track. Monitor the output of the recorder with a matrix box. Back in the studio, run the mid and side tracks through the matrix box, adjust the stereo spread as desired, and record the left and right outputs.

To alter the spread after the recording using a DAW:

  1. Record the mid mic on track 1; record the side mic on track 2.
  2. Copy or clone track 2 to track 3. Be sure the waveforms are aligned.
  3. Pan track 2 hard left; pan track 3 hard right.
  4. Reverse the polarity of track 3 or use an “invert polarity” plug-in.
  5. Group tracks 2 and 3 so their faders move together.
  6. To change the stereo spread, vary the levels of tracks 2 and 3 relative to track 1.

Spaced Pair
With this method (also called AB), you place two identical mics a few feet apart and aim them straight ahead (Figure 4). The mics can have any polar pattern, but omni is most popular for this method. The greater the spacing between mics, the greater the stereo spread.


Figure 4. Spaced-pair technique.

How does this method work?

Instruments in the center of the group produce the same signal from each mic. When you monitor the mics, you hear a phantom image of the center instruments midway between your speakers. If an instrument is off-center, it is closer to one mic than the other, so its sound reaches the closer microphone before it reaches the other one. Both mics produce the same signal, except that the farther mic’s signal is delayed compared to the closer mic’s signal.

If you send the same signal to two speakers with the signal in one channel delayed, the sound image shifts off center. With a spaced-pair recording, off-center instruments produce a delay in one mic channel, so they are reproduced off center.

The spaced pair codes instrument positions into time differences between channels. During playback, the brain decodes these time differences back into corresponding image locations. A delay of 1.2 millisecond (msec) is enough to shift an image all the way to one speaker. You can use this fact when you set up the mics. Suppose you want to hear the right side of the orchestra from the right speaker. The sound from the right-side musicians must reach the right mic about 1.2 msec before it reaches the left mic. To make this happen, space the mics about 2 to 3 feet apart. This spacing makes the correct delay to place right-side instruments at the right speaker.
Instruments partway off center produce interchannel delays less than 1.2 msec, so they are reproduced partway off center.

If the spacing between mics is, say, 12 feet, then instruments that are slightly off center produce delays between channels that are greater than 1.2 msec. This places their images at the left or right speaker. I call this exaggerated separation" or a "ping-pong" effect (Figure 1D).

On the other hand, if the mics are too close together, the delays produced will be too small to provide much stereo spread. Also, the mics will tend to emphasize instruments in the center because the mics are closest to them.

To record a good musical balance of an orchestra, you need to space the mics about 10 or 12 feet apart. But then you get too much separation. You could place a third mic midway between the outer pair and mix its output to both channels. That way, you pick up a good balance, and you hear an accurate stereo spread.

The spaced-pair method tends to make off-center images unfocused or hard to localize. Why? Spaced-pair recordings have time differences between channels. Stereo images produced solely by time differences are not very sharp. You still hear the center instruments clearly in the center, but off-center instruments are harder to pinpoint. Spaced-pair miking is a good choice if you want the sonic images to be diffuse or blended, instead of sharply focused.

Another flaw of spaced mics: If you mix both mic channels to mono, you may get phase cancellations of various frequencies. This may or may not be audible. Spaced mics, however, give a "warm" sense of ambience, in which the concert-hall reverb seems to surround the instruments and, sometimes, the listener. Here's why: The two channels of recorded reverb are incoherent; that is, they have random phase relationships. Incoherent signals from stereo speakers sound diffuse and spacious. Since spaced mics pick up reverb incoherently,
it sounds diffuse and spacious. The simulated spaciousness caused by the phasiness is not necessarily realistic, but it is pleasant to many listeners. Another advantage of the spaced pair is that you can use omni mics. An omni condenser mic has deeper bass than a uni condenser mic.

Near-Coincident Pair
In this method, you angle apart two directional mics, and space their grilles a few inches apart horizontally (Figure 5). Even a few inches of spacing increases the stereo spread and adds a sense of ambient warmth or air to the recording. The greater the angle or spacing between mics, the greater the stereo spread.


Figure 5. Near-coincident pair technique.

How does this method work?

Angling directional mics produces level differences between channels. Spacing mics produces time differences. The level differences and time differences combine to create the stereo effect.

If the angling or spacing is too great, you get exaggerated separation. If the angling or spacing is too small, you hear a narrow stereo spread. A common near-coincident method is the ORTF system, which uses two cardioids angled 110° apart and spaced seven inches (17 cm) horizontally. (ORTF stands for Office de Radiodiffusion
Television Française -- French Broadcasting Organization.) Usually this method gives accurate localization. That is, instruments at the sides of the orchestra are reproduced at or very near the speakers, and instruments halfway to one side are reproduced about halfway to one side.

The NOS (Dutch) system uses two cardioids angled 90° and spaced 12 inches (30 cm), while the DIN (German) system is 90° and 7.9 inches (20 cm). Compared to ORTF, those methods have less off-axis coloration because the mics are less angled away from the center instruments. Also their 90° angle between mics is easier to set up visually than the ORTF 110° angle between mics.

Baffled-Omni Pair
This method uses two omni mics, usually ear-spaced, and separated by a hard or padded baffle (Figure 6). To create stereo, it uses time differences at low frequencies and level differences at high frequencies. The spacing between mics creates time differences. The baffle creates a sound shadow (reduced high frequencies) at the mic farthest from the source. Between the two channels, there are spectral differences -- differences in frequency response.

Some examples of baffled-omni pairs are the Schoeps or Neumann sphere microphones (Figure 7) , the Jecklin Disk, and the Crown SASS-P MKII stereo microphone (Figure 8). The omni condenser mics used in the baffled-omni method have excellent low-frequency response.


Figure 6. Baffled-omni technique.


Figure 7. Sphere microphone.


Figure 8. Crown SASS-P MKII stereo PZM microphone (top view).

A special form of the baffled-omni pair is binaural recording with an artificial head (dummy head). The head contains a microphone flush mounted in each ear. You record with these microphones and play back the recording over headphones. This process can recreate the locations of the original performers and their acoustic environment with startling realism.

You can clip a pair of miniature omni or cardioid mics onto the earpieces of eyeglasses. Each mic is on the opposite side of your head, either in your ears or on your temples. To compensate for the acoustic effect of the head, the signals need some EQ (a broad dip around 3 kHz).

Some manufacturers of binaural microphones are www.core-sound.com and www.sonicstudios.com. Unlike binaural mics which are worn in the ears, Sonic Studios DSM mics are two mini omni condenser mics meant to be worn on your temples (just forward of the ears). They are based on HRTF (Head Related Transfer Function) operation rather than binaural operation. DSM mics are claimed to provide more realistic sound over oudspeakers than binaural mics.

Comparing the Four Techniques

1. Coincident pair:

  • Uses two directional mics angled apart with grilles touching.
  • Level differences between channels produce the stereo effect.
  • Images are sharp.
  • Stereo spread ranges from narrow to accurate.
  • Signals are mono compatible.

2. Spaced pair:

  • Uses two mics spaced a few feet apart, aiming straight ahead.
  • Time differences between channels produce the stereo effect.
  • Off-center images are diffuse.
  • Stereo spread tends to be exaggerated unless a third center mic is used, or unless spacing is
    under 2 to 3 feet.
  • Provides a warm sense of ambience.
  • Provides excellent low-frequency response if you use omni condensers.
  • Tends not to be mono compatible, but this may not be audible.

3. Near-coincident pair:

  • Uses two directional mics angled apart and spaced a few inches apart horizontally.
  • Level and time differences between channels produce the stereo effect.
  • Images are sharp.
  • Stereo spread tends to be accurate.
  • The hall sounds more spacious than with coincident methods.
  • Tends not to be mono compatible.

4. Baffled omni pair:

  • Uses two omni mics, usually ear-spaced, with a baffle between them.
  • Level, time, and spectral differences produce the stereo effect.
  • Images are sharp.
  • Stereo spread tends to be accurate.
  • Excellent low-frequency response.
  • Good imaging with headphones.
  • The hall sounds more spacious than with coincident methods.
  • Stereo spread is not adjustable except by panning the two channels toward the center.
  • More conspicuous than other methods.
  • Tends not to be mono compatible, but this might not be audible.

Boundary (surface-mounted) mics, either with a hemispherical or half-cardioid pattern, can be
used for any type of stereo miking.

Mic Requirements for Stereo
For sharp imaging, the microphone pair should be well matched in frequency response and polar pattern. Be sure both mics are the same model number, and match their levels when picking up a sound source in the center. Or use a stereo mic, which mounts two mic capsules in a single housing for convenience. Some mic manufacturers offer matched stereo mic pairs.

Surprisingly, different transducer types have different imaging. Why? For sharpest imaging, microphone polar patterns and off-axis phase shift should be uniform with frequency. In a ribbon mic, these needs are met. But a condenser mic tends to be less uniform with frequency, and a dynamic tends to be still less uniform. These characteristics affect the imaging of a stereo pair of microphones.

How to Test Imaging
Here is a way to check the stereo imaging of a mic technique.

  1. Set up the stereo mic array in front of a stage.
  2. Record yourself speaking from various locations on stage where the instruments will be --
    center, half-right, far right, half-left, far left. Announce your position.
  3. Play back the recording over speakers. Sit exactly between them, as far away from them as
    they are spaced apart.

You'll hear how accurately the technique translated your positions, and you'll hear how sharp the images are. If you hear a narrow stereo spread, angle or space the mics farther apart. If you hear exaggerated separation, angle or space the mics closer together.

We looked at several mic arrays to record in stereo. Each has its pros and cons. Which method
you choose depends on the sonic compromises you're willing to make.

Recommended Reading
A. Blumlein, British Patent Specification 394,325, J. Audio Eng. Soc., Vol. 6 No. 2, 1958 (April) p 91.
A. Keller, "Early Hi Fi and Stereo Recording at Bell Laboratories (1931-1932)," J. Audio Eng Soc., Vol.29, No.4, 1981 (April), pp.274-280.
These references can be found in Stereophonic Techniques, an anthology published by the Audio Engineering Society, www.aes.org.


For a practical application of these mic techniques, please see the article
Stereo Recording Procedures.

MultiMiking Orchestra 1 (DPA's)

http://www.dpamicrophones.com/en/Mic-University/Application-Guide/Orchestra-Multimiking.aspx

Multimiking a classical orchestra

Classical orchestra with support microphones

Guidelines for a very advanced method with time alligned support microphones on a full classical orchestra

Multi-track recording techniques are mainly build up around a main stereo pair using the A-B Stereo principle. The stereo image is created from the main stereo pair and it is therefore extremely important to place the microphone pair correctly before any support microphones are set up. Guidelines for setting up an A-B Stereo pair are given in the article Miking a classical orchestra in AB stereo in this section, A-B Stereo is explained in detail in the article A-B Stereo in the section Stereo Techniques.

In this part focus will be on placing and choosing the support microphones successfully and on guidelines for how to delay the support microphones to be time aligned correctly with the main stereo pair. Furthermore the focus will be on miking the instrument sections and not the individual musical instruments. Please read about the suggested microphone techniques for individual musical instrument under the relevant sections in the index.

Miking instrument sections

In order to control the different orchestra sections in the recording, it is a good idea to use directional microphones on a limited distance i.e. 1 to 1,5 meters. At these distances the loss of low frequencies due to the proximity effect will be insignificant and a first order cardioid microphone will be able to cover 3-4 musicians. The number and placement of the support microphones should be considered with respect to the -3dB points produced by the microphone's polar pattern and the law of distance to the musicians sitting off-axis to the microphone. A wide use of support microphones supplemented with relevant spot microphones for soloists will give total control of the orchestra, while a more modest number of support microphones can give the room information a higher priority in the recording.

Time alignment depends on room

If the distances from the main stereo pair to the different support microphone sections are larger than 4 meters it is a good idea to consider a time delay of the support microphones. Correct time alignment of the support microphones will preserve the timbre of the musical instruments without comb filter coloring due to phase differences between the support microphones and the main stereo pair. Furthermore a correct time alignment will be true to reflected sounds, which will give the recording important information about the room, i.e. depth, width and of cause reverberation.

The following method is developed by the Danish Broadcasting Corporation Danmarks Radio and is implemented in the radio concert hall Studio 1 in Copenhagen.

Time alignment is very much dependent on the room or concert hall in which the recording is taking place. If each microphone blindly is delayed according to the distance and the speed of sound, there will be severe phasing problems if the musicians move while playing. To overcome the phasing problems while still preserving the timbre of the individual instrument the time delay has to be approximately 25% longer than the first coming sound (at the main stereo pair), calculated relatively to the first reflection (often the floor reflection). Room responses therefore need to be measured in relevant zones, which obviously will take a lot of preparation in each new set-up or in each new location.

Miking Techniques 1

http://audio.tutsplus.com/tutorials/recording/6-stereo-miking-techniques-you-can-use-today/

6 Stereo Miking Techniques You Can Use Today

This entry is part 9 of 16 in the How to Choose and Use Microphones Session - Show All
« PreviousNext »
Twice a month we revisit some of our reader favorite posts from throughout the history of Audiotuts+. This tutorial was first published in August 2008.
Stereo miking is a great way to increase the sense of depth in your recording of an instrument. Here are six stereo miking techniques you can try out today. We’ll start with the basics and then move to some more exciting options.

Before You Get Started

One thing to be careful of in stereo recording is phase cancellation. When using a spaced pair this can be a concern. Phase cancellation occurs when two versions of the same sound, which occur at slightly different times, are mixed together. The result is that when one signal is going into positive amplitude and the other is going into negative amplitude they will cancel each other out and when they are both going the same way they will boost each other.
When two signals are out of phase you will notice a warble in your sound or, if the two signals are 180 degrees out of phase, you will get silence. You will not notice this when the two signals are panned hard left and right. So, to avoid any surprises always check in mono.
The way to minimize your chance of running into phase problems is to use coincident pairs (where the two mics are very close together) or to use the 3:1 rule (place the mics 3 times as far from each other as they are from the sound source).

Phase Cancellation

Spaced Pair

Spaced pair miking is exactly what the name implies. Two cardioid microphones are placed apart from each other to produce two different recordings of the same instrument. I suggest trying two places on the instrument that produce different tonalities. For example, on a guitar you may want to have one mic on the bridge and one on the nut.

Spaced Pair

X-Y

The X-Y configuration takes two cardioid microphones and places them with heads together at 90 degree angles. The result is that the mic on the left will pickup the right side of the room and the mic on the right will pickup the left side of the room.

X-Y

Blumlein Pair

The Blumlein Pair is much like the X-Y technique with one variation. Two bi-directional mics are used at 90 degree angles. The result of this technique is that one mic will pickup the front left and back right of the room while the other picks up the front right and back left of the room. This technique is best if you have a nice sounding room to record in.

Blumlein Pair

ORTF

The ORTF technique is named after the French television and radio commission who invented it (Office de Radiodiffusion-Télévision Française). This is a binaural mic technique which means it is meant to approximate the response of your two ears. In the ORTF technique two cardioid mics are placed at an angle of 110 degrees with the heads 17cm (7”) apart. The beauty of this technique is that mic placement can be as simple as moving around the room until it sounds good and then placing the mics where your head was.

ORTF

Mid-side

In this technique a cardioid mic is placed facing the sound source and a bi-directional mic is placed perpendicular to the cardioid mic (so it is picking up the sides of the room). They are each recorded onto one track. The track with the bidirectional microphone is then copied and the phase is inverted on the copy. The two bi-directional tracks are then panned hard left and right while the cardioid mic is panned center. By adjusting the relative volume of the cardioid mic we can control how close or far away the recorded instrument sounds.
Note: This technique only works in stereo. If this is played back in mono the two bi-directional tracks will cancel each other out.

Mid-side

Decca Tree

The Decca Tree is used mainly for recording orchestras and large ensembles. It was developed in the 1950s by engineers at Decca Records. The Decca Tree uses a special T-shaped mic stand suspended above the conductor’s head. On the T-shaped stand are 3 cardioid microphones facing left, right and centre which are then panned to match their configuration.
There are no fixed measurements for the distance between the microphones but the standard seems to be around 5-7 feet. The mics are usually placed closer together for smaller orchestras and further apart for larger ones.

Decca Tree

Microphone Placements-Orchestra 2

http://mixonline.com/mag/audio_sound_reinforcement_boston/

Sound Reinforcement For the Boston Pops: MIKING THE ORCHESTRA


Mar 1, 1999 12:00 PM, Mark Frink

Polls

In light of Apple releasing its new laptops with the Thunderbolt IO format, which of the following would you do?
I would buy a laptop with Thunderbolt as soon as there are compatible digital I/O products.
Thunderbolt sounds interesting, but it won't affect my workflow either way. I'll pass for now.
This could possibly be for me, but I'm taking a "wait and see" attitude and may jump at it later.

TalkBack

Plug-ins are in use almost every day in any music production. What's your go-to plug-in? What's the oddest use you've put a plug-in into effect? E-mail the staff at mixeditorial@mixonline.com.

As American as motherhood, apple pie and the Office of the Independent Counsel, the Boston Pops made its first appearance in July 1885, when a large and fashionable crowd filled the Boston Music Hall for the first Music Hall Promenade Concert. Conceived by Boston Symphony Orchestra (BSO) founder Henry Lee Higginson, the new series aimed to re-create the ambience of summer evening concerts in Vienna, where Higginson had been a music student. Another goal was to provide summer employment for the members of the Boston Symphony.

Nearly 114 years later, the history of the Boston Pops contains dozens of "firsts." For example, under conductor Arthur Fiedler, the Pops recorded the first orchestral record to sell more than a million copies, and the Pops' special bicentennial program on July 4, 1976, drew an audience of 400,000, the biggest in the history of orchestral concerts. The commercial and popular success of the Boston Pops has not gone unnoticed-today symphony orchestras all over the country offer "Pops" programs, often as part of a marketing campaign to sell season tickets. And for many orchestras, a 4th of July pops program that incorporates a popular guest artist, the "1812 Overture" and a fireworks display helps to underwrite less well-attended performances. Since few (if any) orchestras maintain a full-time sound crew, they generally rely on regional sound companies and independent engineers. To gain insight into the problems of amplifying a symphony orchestra, Mix spoke with BSO live mix engineer Steve Colby.

Colby started out as a New England Conservatory clarinet student. While working in the school's recording studio, he was introduced to the WCRB group that recorded the BSO for radio syndication. This led to stints as a live radio mix engineer for the BSO's Tanglewood broadcasts, and for the New York Philharmonic radio series. Colby has also mixed for TV and radio for artists as diverse as Aerosmith and the Atlanta Symphony. After eight years with Boston's PBS station, WGBH, Colby founded Evening Audio Consultants, which specializes in remote production and orchestral sound reinforcement. When the BSO began performing in arenas and on outdoor stages, he was a natural choice to step into the role of mixing them live. Colby has now been FOH engineer for the Pops for nearly two decades. A veteran of literally hundreds of shows, Colby has developed an approach driven by practical necessity; he must often work with local sound companies whose inventory is geared toward more typical live concert productions.

Perhaps the primary challenge Colby faces is miking the orchestra. Approaches for miking symphony orchestras run the gamut from a well-placed stereo pickup to placing a mic on every instrument. Colby's method incorporates a multimiking scheme with a planned measure of controlled bleed between sections. This approach, says Colby, helps create a sense of depth and stage perspective, while also allowing for rebalancing. It also provides superior gain before feedback.

"I've fielded a lot of questions from people who don't understand why a stereo pair isn't the best way to go," says Colby. He doesn't dispute the argument that the fewer microphones used, the truer the phase relationship. "However, given the challenging acoustics of large arenas and outdoor venues, we've found that the orchestra needs a fair measure of rebalancing over the course of a program," he explains. "A lot of dynamic adjustments are made by the players as they get used to their stage environment. Some of it also boils down to a brute gain issue-if you need to get loud enough to overcome a noisy air handling system or a ball park with chatty patrons, you need more microphones placed closer to the sound source."

Since so many of the Boston Pops events are "one-offs," Colby has developed a mic list that conforms to what most good regional P.A. companies have in their standard inventory, or can easily rent locally. "While I would always prefer using a stage full of Schoeps condensers, the quantities needed of those excellent microphones are frequently not available, or are beyond the resources of the event," Colby explains.

MIC CHOICE AND PLACEMENT Colby's microphone setup generally relies on one microphone model per section. "Within the violins, violas and cellos, my favorite has emerged as the Shure SM81 because of its consistency and directional characteristics," says Colby. "It almost acts like a short-throw shotgun, letting me place the mic a little farther away from the instruments without giving up a lot of isolation. Most classical instruments sound better with the mic at a distance of several feet, not several inches. It gives the sound a little room to breathe." Other acceptable mics for these sections include AKG 535 and 451 models.

Colby mikes the first violins from behind, with the microphone extending over the shoulders of the players and aimed at a spot equidistant from the two instruments occupying that "stand" (two players share a single music stand). The mic is typically placed two feet above the heads of the musicians and carefully positioned to avoid being struck by a bow during performance. "This position produces a warm sound that's somewhat direct without a lot of upper-midrange screech that needs to be EQ'd out," offers Colby.

Second violins are miked at a similar distance and angle, but from the front of the instruments. "This works out well for a couple of reasons," Colby explains. "It allows me to have a diversity of string tonality within that section, which makes the overall violin sound a little more three-dimensional. It also helps balance when the seconds play a musical line that is lower in range." Having the mics pointing more directly at the seconds helps to bring out the details of the orchestration. "It's kind of a self-mixing technique," adds Colby.

Violas are also miked from behind and slightly upstage. Since the viola section sits stage-right of the conductor, the top of the instruments face more directly toward the microphones, which helps to increase their presence. "Violas are problematic because they have a lower, darker tone, and it's hard to bring them out in the mix, but they're very important," Colby continues. "They often act as a sonic glue for the string section. They're sort of like the high-mids in a four-way system."

Cellos are generally miked with a short boom reaching under the music stand in front of two players, with the mic about two feet from a point between the pair. "I actually prefer a cello miked from above, but it doesn't turn out to be practical," comments Colby. "The extra gain and presence win out over sonic superiority in this case."

Colby's favorite mic on basses is the AKG 414 set on a cardioid pattern, one per stand, again reaching under the music stand and positioned at the height of the instrument's F-hole. Colby notes that placing the microphone at this height yields a good blend of bass "thump" and detail, reducing the need for radical EQ.

WOODWINDS AND BRASS Typically, the woodwinds sit in two rows at the center of the stage, just upstage of the conductor's podium. Colby places a Sennheiser 421 between the first two players of each woodwind type-flutes, clarinets, oboes, bassoons-with a fifth mic to accent the low-pitched English horn. Piccolo flute, bass clarinet and contra bassoon are generally left unmiked and are picked up as bleed into other nearby microphones, a technique that helps give the sonic impression of depth.

French horns sit just behind the woodwinds, while the remainder of the brass section-trumpets, trombones and tuba-occupy two rows in the upstage left corner of the stage. Here, Colby's favorite setup is 414s all around, but more frequently he'll use two Sennheiser MD-409s to cover four trumpets, plus a pair of 421s on trombones and a Shure SM57 above the tuba, less than a foot from the bell. "I've really gone 'around the barn' on mic selection for French horns," says Colby. "For now I've settled on a pair of EV RE-20s set on the drum riser behind the section. These mics are only used occasionally in the mix to add presence to a particular musical passage. Most of the rich horn sound comes from bleed into the woodwind mics."

For the harp, Colby eschews the use of a contact mic and usually points an 81 or a 451 at the middle of the sound board, orienting the mic away from the timpani, which is a loud neighbor. "I haven't really had the harp problems I've heard others talk about," Colby comments, though he notes that the harp is one of the few instruments on which he uses a compressor, limiting its dynamic range to allow more control in the mix. "The harp is a wily instrument dynamically," Colby explains. "Without gentle compression, certain notes pop out more than you want, while the rich low notes can almost disappear." Colby uses no more than a 3:1 ratio and likes to see 2 to 4 dB of reduction on a good passage. Similar compression is used on the "Mr. Rogers" bell tones of the celeste, as well as on the pitched percussion mics; percussionists often play "toys" (triangle, whistles, sleigh bells, etc.) close to these mics, which are set up for the more distant mallet instruments.

The percussion section is spread out in the upstage right corner. Colby uses condensers on percussion, and it's one of the few places where he prefers AKG 451s, with one per pitched (mallet) instrument. "I mike from above, at about seven feet, over the low end of the instrument and aimed toward the high end," he explains. Another 451 is set up for the "toys." Colby covers the four timpani with two SM57s on short booms, each mic pointing down between a pair of drums from about 18 inches. "They lend a nice, warm presence and are not in the player's way," Colby notes. What is called the battery (the concert snare and bass drum), doesn't need a mic, since these instruments bleed into many other inputs. "The string mics are great for providing a sense of distance for the battery," says Colby.

Typically, Colby leaves roll-off switches on the microphones flat and makes adjustments at the board. "A real rookie mistake that I used to make was setting the highpass filters too high out of concern for feedback," Colby comments. "There's a wonderful wash of energy onstage that is useful to thicken out the orchestra. You're going to get some bleed anyway, so you want it to make a fidelity contribution to the mix."

At the board, Colby sets highpass cuts at 60 Hz on violin mics, with 40 and 50Hz cuts for celli and double bass mics, depending on the choice of mic and the P.A.'s response in the room. He sets highpass filters on harp at 100 Hz, woodwinds and trumpets at 80 Hz, and trombones at 50 Hz. Tuba and timpani are cut down at 25 Hz, pitched percussion at 80 Hz.

One of the ways in which the Pops differs from a traditional orchestra is the presence of a rhythm section located upstage center, including a drum kit, bass and keyboards, often augmented with a guitar and synthesizer. For piano, Colby uses a single SM81 in the middle of the piano pointing back at the hammers, plus a Barcus Berry Planar Wave piano pickup. "Where the piano is so close to the drum kit, [the pickup] helps with isolation," he explains. The kit is miked simply, with a single overhead condenser pointed at the drummer's right knee and a 57 on the kick placed on the pedal side. The electric bass and synth are run through DIs, and the guitar is miked with a 57 on the amp.

LOST WITHOUT COOPERATION To keep the stage neat and safe with this large number of microphones, Colby limits the number of cable paths to a minimum and lays down a lot of gaffer's tape after the line check. All the string section mic cables, as well as the majority of the mic stand bases, are placed in a stage-wide alley that exists within the body of the string section. Even so, Colby notes, he would be lost without the cooperation of the musicians. "Our players are quite gracious about looking after mic placement, because the stage setup often gets shuffled during the last five minutes before show time," Colby comments. "They're aware of the technical difficulty our show presents and will tug a mic back into position if they have to shift their chair. It's not a bad idea to briefly introduce the musicians to their mics and indicate the correct position as you're checking the stage."

On a Pops tour, the nearest thing to a soundcheck is often a short rehearsal before the first show of the run. Colby starts by listening to the orchestra with the P.A. turned off to see how the venue acoustics treat the natural sound of the orchestra. "We are in the 'reinforcement' business here," he comments. "Our strategy is to augment and complement the basic sound of the orchestra whenever possible." Next, he starts creeping up one section at a time, beginning with the strings. "I want to put up the microphones that will present the most severe 'washout' first, and then I can fill in the detail of everything else around that," Colby explains. "It's the same philosophy as getting a rock drum sound together with the lead vocal mic open-using the onstage bleed to create the overall sound."

Input gain settings are critical. "I'm one for driving a console at its sweet spot and then making adjustments after the desk," Colby remarks. He hears the same warmth in the woodwinds and strings when the desk is correctly trimmed that other engineers can hear in their lead singer when the vocal channel is opened up optimally.

Colby's most frequent equalization adjustment is to the high-mids on the violin mics. "Temperature and humidity play a role with any wooden instrument, plus the players tend to dig in a little more if they can't hear well, and this can contribute to a harshness of string sound," he says. For this important adjustment, Colby usually dips out 3 to 6 dB between 800 Hz and 2 kHz. He uses wide filters because he finds they sound more musical and natural.

On the low strings (celli and basses), Colby often finds that there is an unwanted 400Hz sweet spot. "I think it may have to do with the fact that the orchestra is sitting on a 40 by 60 hollow platform," he explains. "This is another place where a little high end can add some detail." On the woodwinds, he often ends up taking a little 300 Hz out and putting in a little articulation bump between 5 and 6 kHz, especially when using 421s. This lets him run the section a little softer, but still reveals detail in subtle woodwind lines.

The ability to mix in a way that highlights the subtle nuances of specific instruments is one of the benefits of amplifying orchestral music. The other, main advantage, of course, is the power to bring symphonic music to a new audience. Though there's obviously some crossover, the folks who go to Pops concerts in a park or shed are not always the same people who frequent concert halls. The BSO's Pops programs blazed the trail for symphonies all over the country, giving them a way to reach new fans by playing old favorites.